In this article we will explore the functionalities of dockerapi gem, a Ruby gem to interact directly with Docker API through HTTP. Differently from other gems, this gem uses HTTP requests to create a true API-like implementation behaviour. If you want to interact with Docker in an object-oriented approach, the traditional docker-api would be a better fit. If you want to manipulate the Docker client in the host machine, see docker gem.
Most gems seem to be abandoned for years, even the most famous ones. This alone wouldn't be a great deal, but they also lack functionality: not only Containers and Images are important, but Networks, Volumes, Swarms, Nodes, Secrets and so on. This gem aims to implement as most of the Docker API functionalities as possible.
We are going to create a simple application to demonstrate the gem functionality, starting with the basics (Images and Containers) to understand the general usage and then expand it to other functionalities. Creating images and containers in a Ruby script or in IRB would be as simple as running 5-6 commands. So, to spice up the learning process a little bit, we are going to create a Rails application and integrate our gem in this interface.
To see the gem in use without using Rails or to find examples of more features, this GitHub reposiroty contains plenty of examples.
At the end of this tutorial, our application will be able to perform the following:
Pull a Nginx image from DockerHub.

Create a new container based on this image.

Start the container using the interface.

Access the service on port 80.
Before starting you need set:
- Docker (installation guide)
-
- Add docker group to user user groups as needed
- Ruby + Rails (quick and dirty setup here)
-
- Don't forget Rails dependencies like node, yarn, etc.
We are not covering the above, there are great tutorials on how to install and setup those. All the code created for this article is available here.
Without further ado, let's create a Rails application:
$ rails new dockerapi-demo -O -B
$ cd dockerapi-demo
We are creating an application without active record (-O) and we are skipping bundle install (-B) for now.
Add dockerapi gem to Gemfile
gem 'dockerapi', '>= 0.17.0'Install gems:
$ bundle installLet's create two controllers (Image and Container) and their views:
$ rails g controller image index new create delete
$ rails g controller container index new create start stop delete
We'll create a CRUD for both, but instead of reading and writing to a database, we'll communicate with Docker API the retrieve and send information.
The above step created some lines in config/routes.rb, replace everything with:
root_to: "image#index"
resources :image,     only: [:index, :new, :create, :destroy]
resources :container, only: [:index, :new, :create, :destroy]
get "/container/start/:id", to: "container#start"
get "/container/stop/:id", to: "container#stop"
Add the following in app/views/layout/application.html.erb, replacing the content of the file:
<!DOCTYPE html>
<html>
  <head>
    <title>Dockerapi Demo</title>
    <%= csrf_meta_tags %>
    <%= csp_meta_tag %>
     <meta name="viewport" content="width=device-width, initial-scale=1, shrink-to-fit=no">
    <link rel="stylesheet" href="https://cdn.jsdelivr.net/npm/bootstrap@4.5.3/dist/css/bootstrap.min.css" integrity="sha384-TX8t27EcRE3e/ihU7zmQxVncDAy5uIKz4rEkgIXeMed4M0jlfIDPvg6uqKI2xXr2" crossorigin="anonymous">
    <%= stylesheet_link_tag 'application', media: 'all', 'data-turbolinks-track': 'reload' %>
    <%= javascript_pack_tag 'application', 'data-turbolinks-track': 'reload' %>
  </head>

  <body class="container">
  <div class="text-center">
    <%= link_to "All images", image_index_path, class: "btn btn-primary" %>
    <%= link_to "Pull image", new_image_path, class: "btn btn-primary" %>
    <%= link_to "All containers", container_index_path, class: "btn btn-primary" %>
    <%= link_to "New container", new_container_path, class: "btn btn-primary" %>
  </div>
    <%= yield %>
  </body>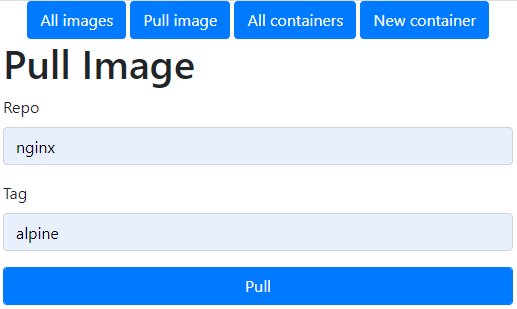
</html>At this point, we can run the application, but we still don't have any functionality. Let's fix that by creating a form for pulling images. Edit app/views/image/new.html.erb:
<h1>Pull Image</h1>
<%= form_with(url: "/image", method: "post", local: true) do |form| %>

  <div class="form-group">
    <%= form.label :repo %>
    <%= form.text_field :repo, class: "form-control" %>
  </div>

  <div class="form-group">
    <%= form.label :tag %>
    <%= form.text_field :tag, class: "form-control" %>
  </div>

  <div class="actions">
    <%= form.submit "Pull", class:"btn btn-primary form-control" %>
  </div>
<% end %>
Edit app/controllers/image_controller.rb creating the before_action hook and the private methods below:
class ImageController < ApplicationController
  before_action :set_image

  # [...]

  private
    # Use callbacks to share common setup or constraints between actions.
    def set_image
      @image = Docker::API::Image.new
    end

    # Only allow a list of trusted parameters through.
    def image_params
      params.permit(:repo, :tag)
    end
end
The combination of set_image method and the before_action hook will create a new instance of the Dokcer API connection before executing other methods, pointing to endpoints related to Image commands.
For this exercise, we are only using repo (repository name) and tag to pull an Image, but many more options are available and described in the Gem documentation.
Now, let's edit image#create in the same file:
def create
    response = @image.create( fromImage: "#{image_params[:repo]}:#{image_params[:tag]}" )
    if response.success?
        redirect_to image_index_path
    else
        render :new
    end
end
When you access Pull image and submit the form, image#create is called. In the console log we have the confirmation that the Image was successfully pulled:
=> "{\"status\":\"Status: Image is up to date for busybox:1.32.0-uclibc\"}\r\n"Let's explore the code we created.
response = @image.create( fromImage: "#{image_params[:repo]}:#{image_params[:tag]}" )This line is using the connection that we created in the before_action hook. It's using "fromImage" as hash key as request body parameter as described in the documentation Dokcer API docs for pulling an image from a registry:
Name of the image to pull. The name may include a tag or digest. This parameter may only be used when pulling an image. The pull is cancelled if the HTTP connection is closed.
Different options are used for different behaviour for the same endpoint. The API documentation is a good source to learn what the expected behaviour might be for each one.
if response.success?
    redirect_to image_index_path
else
    render :new
end
This code will redirect the user to the image#index page in case of a successful request (status code 2xx), or show the form again otherwise.
Now, once we submit the form we'll pull the image in case it doesn't exist. You can give it a try! Notice that our index page won't show anything even though we already have the Image in our filesystem so let's work on that next!
Replace the content in app/views/image/index.html.erb with:
<h1>All Images</h1>

<table class="table">
  <thead>
    <tr>
      <th>Repo</th>
      <th>Size</th>
      <th colspan="1"></th>
    </tr>
  </thead>
  <tbody>
    <% @images.each do |image| %>
      <tr>
        <td><%= image["RepoTags"][0] %></td>
        <td><%= image["Size"] %></td>

        <td><%= link_to 'Delete', image_path(image["Id"]), method: :delete, data: { confirm: 'Are you sure?' } %></td>
      </tr>
    <% end %>
  </tbody>
</table>
Change image#index to the following:
def index
    @images = @image.list.json
end
And image#destroy:
def destroy
    @image.remove(params[:id])
    redirect_to image_index_path
end
The index page is just iterating over the image list, showing repository name, image size in bytes and an option to delete the image.
@images = @image.list.jsonThis line queries the Docker API for a list of containers. The response has many elements, such as status, headers and more. We are interested in the JSON content inside the response body and this is exactly what Docker::API::Response#json method access.
@image.remove(params[:id])This line tells the API to remove an Image with a given id, passed as request parameter. This parameter can be the Image name or Id, as specified in Docker API docs.
The complete ImageController class, with everything we created so far:
class ImageController < ApplicationController
  before_action :set_image
  def index
    @images = @image.list.json
  end

  def new
  end

  def create
    response = @image.create( fromImage: "#{image_params[:repo]}:#{image_params[:tag]}" )
    if response.success?
      redirect_to image_index_path
    else
      render :new
    end
  end

  def destroy
    @image.remove(params[:id])
    redirect_to image_index_path
  end

  private
    # Use callbacks to share common setup or constraints between actions.
    def set_image
      @image = Docker::API::Image.new
    end

    # Only allow a list of trusted parameters through.
    def image_params
      params.permit(:repo, :tag)
    end
endNow that we have a simple CRUD for Images, we'll do the same for Containers. In the form we'll add host configuration to access a Nginx container in the browser. We've already created some files, let's modify them accordingly.
Edit app/views/container/new.html.erb:
<h1>New Container</h1>

<%= form_with(url: "/container", method: "post", local: true) do |form| %>

  <div class="form-group">
    <%= form.label :name %>
    <%= form.text_field :name, class: "form-control" %>
  </div>

  <div class="form-group">
    <%= form.label :image %>
    <%= form.select :image, options_for_select(@images, @images.first), {}, {class: "form-control"} %>
  </div>

  <div class="form-group">
    <%= form.label :host_config %>
    <%= form.text_area :host_config, class: "form-control" %>
  </div>

  <div class="actions">
    <%= form.submit "Create", class: "btn btn-primary form-control" %>
  </div>
<% end %>
We need Image information for the container form, add the following to container#new in app/controllers/container_controller.rb:
def new
  image = Docker::API::Image.new
  response = image.list
  @images = response.json.map{ | r | r["RepoTags"][0] }
end
We've seen some of these before, but let's take a look.
image = Docker::API::Image.newWe create a new connection to the API, pointing to Image related endpoints.
response = image.listDocker::API::Image#list will list all available images.
@images = response.json.map{ | r | r["RepoTags"][0] }Having the API response, we map one RepoTag for each Image and make them available in @images variable to the front end.
This is everything needed for the form to work, but we still need to set up a few things in the Container controller. Similarly to what we did before, let's create the before_action hook to connect to the API and the form parameters:
class ContainerController < ApplicationController
  before_action :set_container, except: [:new]

   # [...]

  private
    # Use callbacks to share common setup or constraints between actions.
    def set_container
      @container = Docker::API::Container.new
    end

    # Only allow a list of trusted parameters through.
    def container_params
      params.permit(:name, :image, :host_config)
    end
end
And at last, let's create container#create:
def create
    host_config = eval(container_params[:host_config])
    response = @container.create( {name: container_params[:name]}, {Image: container_params[:image], HostConfig: host_config })
    if response.success?
        redirect_to container_index_path
    else
        redirect_to new_container_path
    end
end
Let's understand this code.
host_config = eval(container_params[:host_config])Since the information travels through the internet as text, we need to evaluate it to a Hash object, which is the expected object to be used as parameters.
response = @container.create( {name: container_params[:name]}, {Image: container_params[:image], HostConfig: host_config })This line will send a HTTP request to POST /container/create in the Docker API. The first hash is for query parameters and they usually are written in lower case. The second hash is for the request body and they are usually in upper case. It's set like this because this is how it's specified in Docker API documentation. For this particular endpoint, see this link and find more options for container creation.
if response.success?
    redirect_to container_index_path
else
    redirect_to new_container_path
end
Based on the response, we redirect the user to the Container list or back to the form.
Now you can try creating a Nginx container. Pull a Nginx image (I suggest using alpine tag), then in the container creation form, select the image and enter the following host configuration: {PortBindings: {"80/tcp": [ {HostIp: "0.0.0.0", HostPort: "80"} ]}} - this will link container port 80 to port 80 on the host.
NOTE: you can see that the host configuration is a string representation of a Ruby hash. It encompasses several nested elements, according to the Docker API documentation. In the example above, we have the following structure: HostConfig > PortBindings > <Additional Properties> > HostIp + HostPort in the same nesting setup of the Docker API. For a better understanding, try comparing what we have above with [the documentation](https://docs.docker.com/engine/api/v1.40/#operation/ContainerCreate) and finding all the options we are using there as well.
If everything worked right, you went back to a blank index page. Let's display useful information here. Replace the content in app/views/container/index.html.erb with:
<h1>All Containers</h1>

<table class="table">
  <thead>
    <tr>
      <th>Name</th>
      <th>Image</th>
      <th>State</th>
      <th colspan="3"></th>
    </tr>
  </thead>
  <tbody>
    <% @containers.each do |container| %>
      <tr>
        <td><%= container["Name"] %></td>
        <td><%= container["Image"] %></td>
        <td><%= container["State"] %></td>
        <td><%= link_to 'Start', "/container/start/#{container['Id']}" %></td>
        <td><%= link_to 'Stop', "/container/stop/#{container['Id']}" %></td>
        <td><%= link_to 'Delete', container_path(container["Name"]), method: :delete, data: { confirm: 'Are you sure?' } %></td>
      </tr>
    <% end %>
  </tbody>
</table>
In container#index add the following:
def index
  @containers = @container.list(all: true).json
  @containers.map { | c | c["Name"] = c["Names"][0].gsub("/", "") }
end
For the Docker::API::Container#list method, the only difference from what we did before with Images is the all: true option. Since only active containers are shown by default, we need to specify this flag to see inactive ones.
@containers.map { | c | c["Name"] = c["Names"][0].gsub("/", "") }This line is adjusting the container name, removing the leading / character.
The Docker API creates the container, but it's not started automatically. That's why our interface has links to start and stop the containers.
Now that we are able to see our containers, let's start our newer one. Modify container#start and container#stop as following:
def start
    @container.start(params[:id])
    redirect_to container_index_path
end

def stop
    @container.stop(params[:id])
    redirect_to container_index_path
end
At this point you may be familiar with the gem's syntax: the start and stop methods within Docker::API::Container use the container id to tell the API which container to start or stop.
Now, let's go ahead and hit the Start link for our Nginx container. The state should change to running and a Nginx welcome page should be available in the browser accessing the machine IP address (or localhost) on port 80 (assuming you are not using this port to anything else). Likewise, using the Stop link will stop the container, changing the status to exited and it will no longer be available in the browser.
To finish the Container CRUD, let's create the deletion functionality. Edit container#destroy:
def destroy
    @container.remove(params[:id])
    redirect_to container_index_path
end
The complete ContainerController class:
class ContainerController < ApplicationController
  before_action :set_container, except: [:new]
  def index
    @containers = @container.list(all: true).json
    @containers.map { | c | c["Name"] = c["Names"][0].gsub("/", "") }
  end

  def new
    image = Docker::API::Image.new
    response = image.list
    @images = response.json.map{ | r | r["RepoTags"][0] }
  end

  def create
    host_config = eval(container_params[:host_config])
    response = @container.create( {name: container_params[:name]}, {Image: container_params[:image], HostConfig: host_config })
    if response.success?
      redirect_to container_index_path
    else
      redirect_to new_container_path
    end
  end

  def start
    @container.start(params[:id])
    redirect_to container_index_path
  end

  def stop
    @container.stop(params[:id])
    redirect_to container_index_path
  end

  def destroy
    @container.remove(params[:id])
    redirect_to container_index_path
  end

  private
    # Use callbacks to share common setup or constraints between actions.
    def set_container
      @container = Docker::API::Container.new
    end

    # Only allow a list of trusted parameters through.
    def container_params
      params.permit(:name, :image, :host_config)
    end
end
We've come a long way, don't we? Congratulations, you're now manipulating Docker API using dockerapi gem!
We have so much more in the dockerapi gem. We can manage Volumes, Networks, Secrets, Swarms, Nodes, Services, and more! Try creating the Network management system and include a Network option in the Container creation form. Try the same for Volumes as well. If you go far enough, you can end up with your own version of Portainer! Take a look at the gem docs and see what other information come with the response object of each request. This would cover the basics of the gem usage and its capabilities. I hope you like it!
Creating Docker Images and Containers are the basics, dockerapi has much more. You don't need to use it only within a Rails application, it'll work in any Ruby workflow. Don't have a local Docker installation? It works with remote API connection as well. Take a look at the GitHub repository and find out more!